{:th}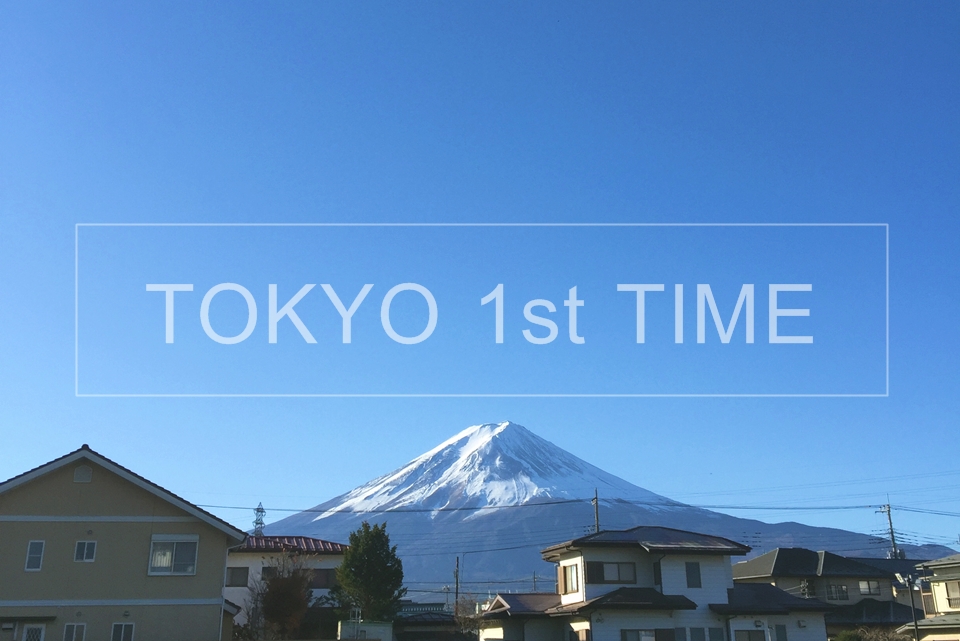
:: โตเกียวแม่ม ไม่ได้อยู่ในลิสต์เดินทางของผมเร็วๆ นี้เลย โดยส่วนตัวคิดว่า มันง่าย ไปเมื่อไหร่ก็ได้ เพราะมันเป็นประเทศที่เจริญแล้วและปลอดภัย แต่เมื่อช่วงต้นปี ระหว่างที่เช็ค new feed อยู่บนมือถือ เห็นคนแชร์กระทู้ Backpack ลุยเดี่ยวเที่ยวโตเกียวด้วยเงิน 20,000 บาท(ไม่รวมตั๋วเครื่องบิน) รู้สึกตื่นตาตื่นใจ และสนใจมากๆ เห่ยยยย… ทำได้ไงฟร๊ะเนี่ยยย ทำไมเมิงเที่ยวถูกจังอะ
แต่ยัง…
กุทำให้ถูกได้มากกว่านั้นอีก ๕๕๕๕๕
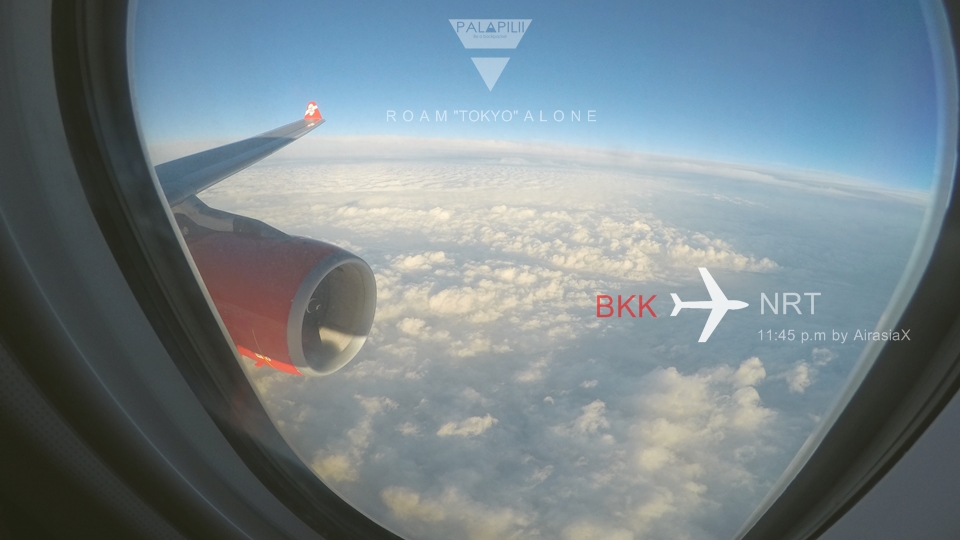
1. จองตั๋วเครื่องบิน วางแผนดีๆ แล้วถามตัวเองว่า เมิงอยากไปเห็นโตเกียวในแบบไหน แบบที่มีสีชมพู แบบที่มีสีแดง แบบเขียวๆ หรือแบบขาวโพรน จากนั้นก็จองตั๋วตั้งแต่เนิ่นๆ เพื่อเซฟคอส แนะนำให้บินตรงกะ AirAsiaX ไปเลย เท่าที่เช็คมา เจ๊แกก็ถูกที่สุดแล้ว
ทางไปจอง http://www.airasia.com/
2. สั่ง sim ไว้เล่นเน็ต ประเทศนี้เรื่อง internet สำคัญมากๆ แทบจะทุกสิ่งอย่างต้อง book หรือสำรองที่นั่งไว้ก่อน คิดจะ walk in เหมือนบ้านใกล้เรือนเคียงระวังจะเงิบ แล้วพอทุกอย่างมันพลาด มันก็ไหลยาวจนเมิงต้องอยู่แค่ในโตเกียวนั่นแหละ แนะนำ sakura sim สั่งจอง แล้ว shipping ไปที่สนามบินเลย เราเลือกโปร 3GB ราคา 3,500 ¥ ใช้ได้นาน 45 วัน แม่มชิคโคตรๆ
ทางไปจอง http://sakurasim.com/
3. การวางแผนสำคัญมาก นี่คือตัวอย่างของทริปที่เราแนะนำ
วันแรก : เที่ยวแม่มให้หมดโตเกียวเลย ข้อมูลหาใน google แล้วคัดแต่ที่ที่เราอยากไป จะได้ไม่เสียเวลา
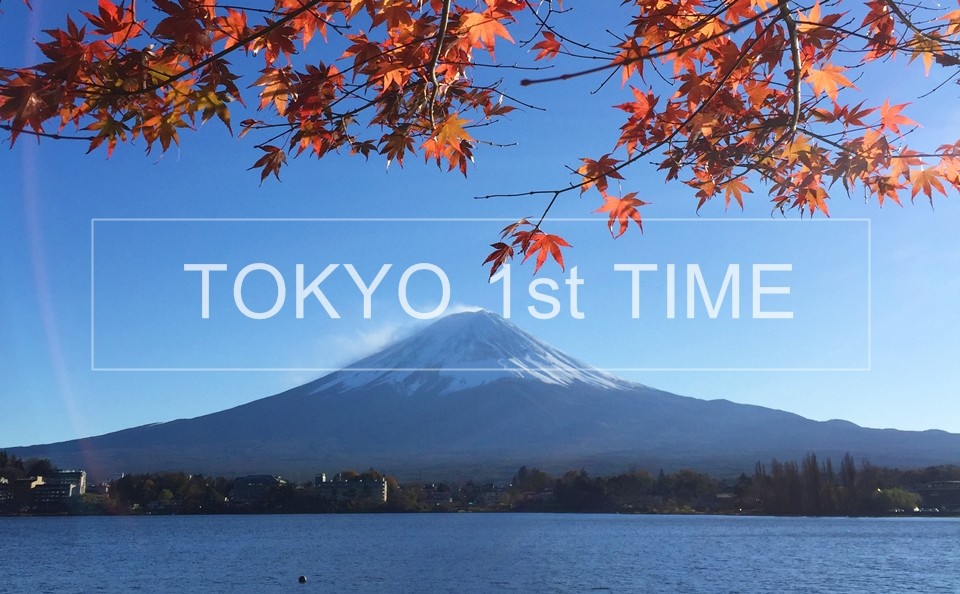
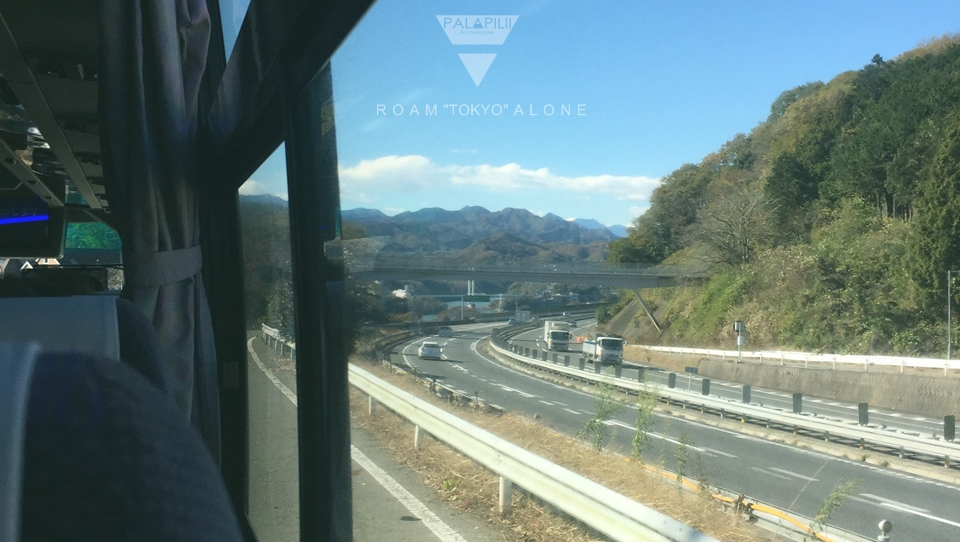
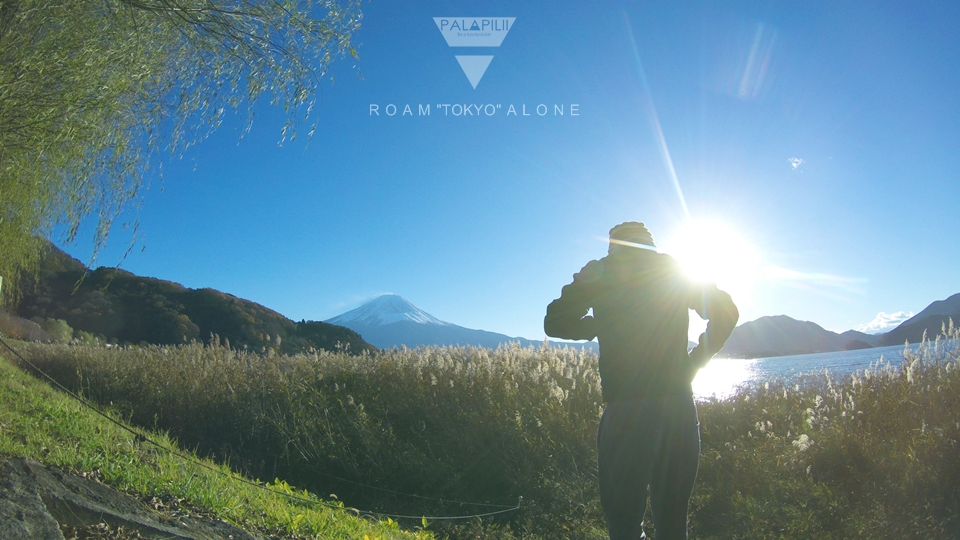
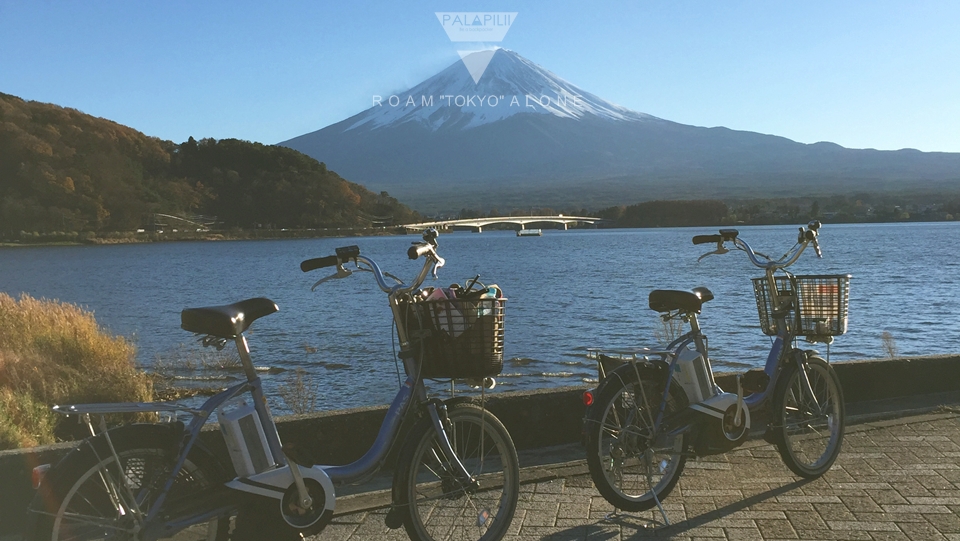
วันที่สอง : ออกนอกเมืองไปดูฟูจิ ที่คาวากุจิโกะ อันนี้สุดจริง อยากกลับไปอีกเพราะที่นี่เลย
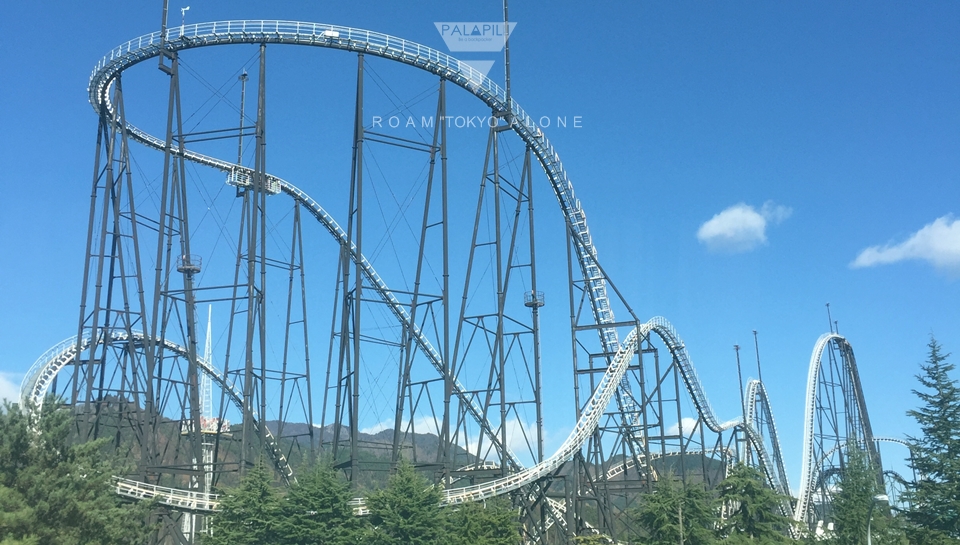
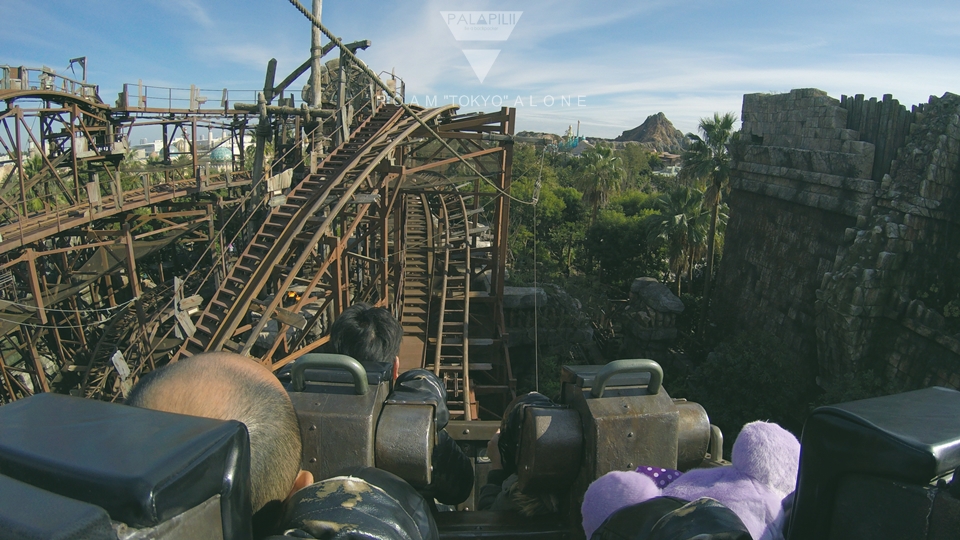
วันที่สาม : ไปสวนสนุกอันดับโลก Fuji Kyu Highland เค้าว่ากันว่าทบ้านผีสิงที่นี่ เ_ี้ยมากๆ ๕๕๕๕
(จบคืนที่สามแนะนำให้กลับไปเมาที่ Roppongi)
วันที่สี่ : เลือกเอา ว่าจะเข้า disneyland หรือ disney sea จริงๆ ก็ไม่แนะนำหรอก เพราะเด็กน้อยไป แต่ด้วยความที่ว่าครั้งแรก ต้องลอง เสร็จจากนั้นก็นั่งบัสกลับสนามบินได้เลย
:: เป็นไง แพลนพอได้ป่าว ถ้าไม่ชอบ วันที่สามกับสี่ เปลี่ยนำป Nikko ก็น่าสนใจนะ ๕๕๕
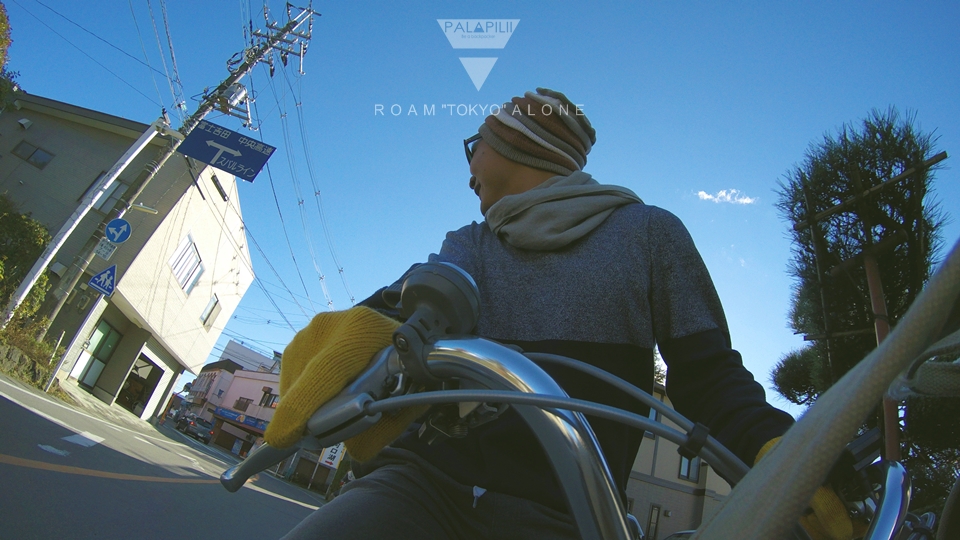
4. ตั๋วบินมี ซิมก็มี แผนก็มี ทีนี้ก็มาเดินทางกันจริงๆ ละ ตอนบินแนะนำให้บินตอนดึก จะได้มาเช้าที่นาริตะพอดี จะได้มีเวลาแบบ Full day กันไปเลย
ปล. ใครที่ทำตามข้อ 2 อ่านต่อ ข้อ 5 ไม่ได้ทำตามข้ามไปข้อ 6
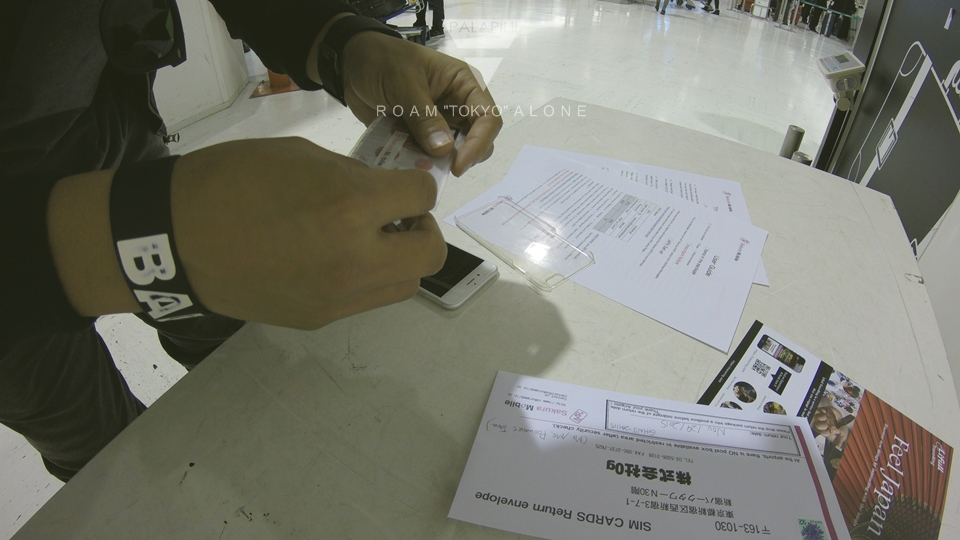
5. พอถึงสนามบิน ให้รีบขึ้นไปชั้น 3 เราจะไปเอา sim ที่ post office จะอยู่ตรงข้าม Counter check in C เปิดเวลา 8:30 น. เป๊ะๆ เสร็จจากนั้นก็รับ sim แล้วก็ใส่ sim ได้เลย ตอนที่เราสั่งจอง มันจะมีเมลจ้งเตือนให้เรา set ค่า VPN ให้ support กับเครือข่ายของที่นี่ อย่าลืมทำหละ ไม่งั้นจะใช้งานไม่ได้
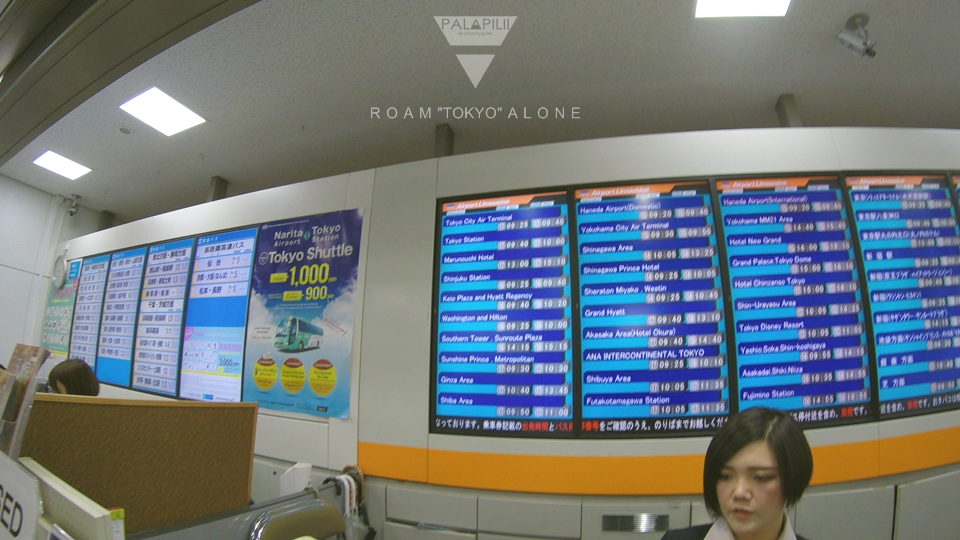
6. ไปชั้น 2 ของสนามบิน ทางออก 3 มองไปทางซ้าย จะเห็นที่ซื้อตั๋วเข้าเมือง แนะนำให้ไปบัส เพราะสะดวกกว่าสำหรับมือใหม่ เลือกรอบเร็วสุดคือ 9:40 น. ราคา 3,100¥ ใช้เวลาชั่วโมงครึ่งถึง Tokyo station
:: เอาหละ พอจบข้อ 6 ก็ยินดีต้อนรับสู่มหานครโตเกียว รับรองว่าเฟี้ยวสุดๆ ๕๕๕๕
7. แนะนำให้โหลดแอพ maps.me มาครอบครอง สถานที่ตรงไหนสำคัญ ปักหมุดไว้เลย แล้วเวลาเราไปไหน ก็ปักหมุดไว้ด้วย กันหลง กันลืม คราวนี้เปิด map แล้วหาสถานีรถไฟที่ใกล้ที่สุด สึส! อยู่ฝั่งตรงข้าม

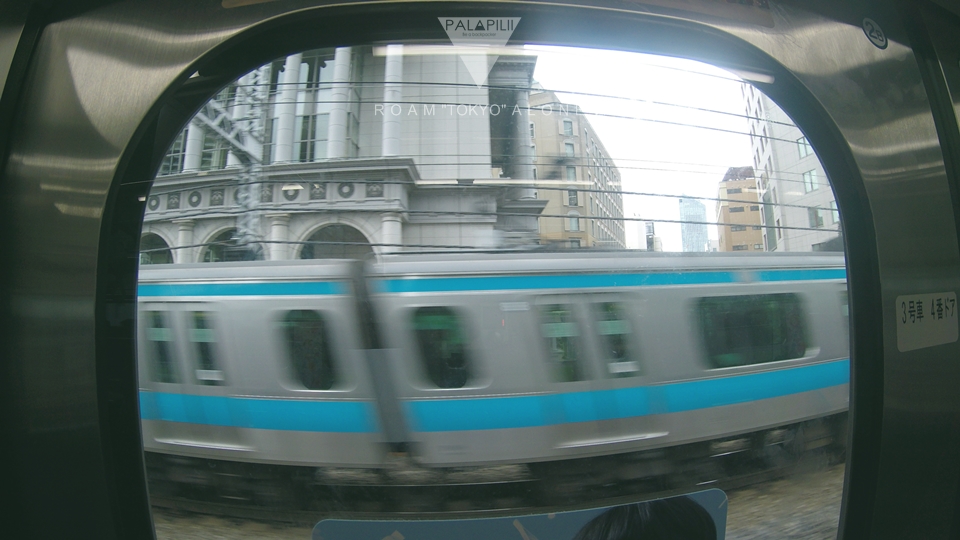
8. การนั่งรถไฟในญี่ปุ่นง่ายเหมือนปลอกกล้วยเข้าปากครับ เหมือนสมัยประถม ที่เราลากเส้นจากจุด A ไปจุด B พอมันตัดผ่านอะไร ก็หาทางโยงไปที่จุด B ให้ได้ และนั่นก็คือวิธีการเดินทางครับ ไม่มีหลงแน่นอน ส่วนเรื่องราคา ก็ดูตามแผนที่ครับ จะบอกราคาเอาไว้เหมือน bts บ้านเรา จากนั้นก็กด หยอดเหรียญ แล้วรอรับตั๋ว ตั๋วที่นั่นจะเป็นกระดาษใบเล็กๆ สายรถไฟแต่ละสายจะมีสีเป็นสัญลักษณ์ชัดเจน อธิบายคร่าวๆ พอจะเข้าใจมั้ยนะ
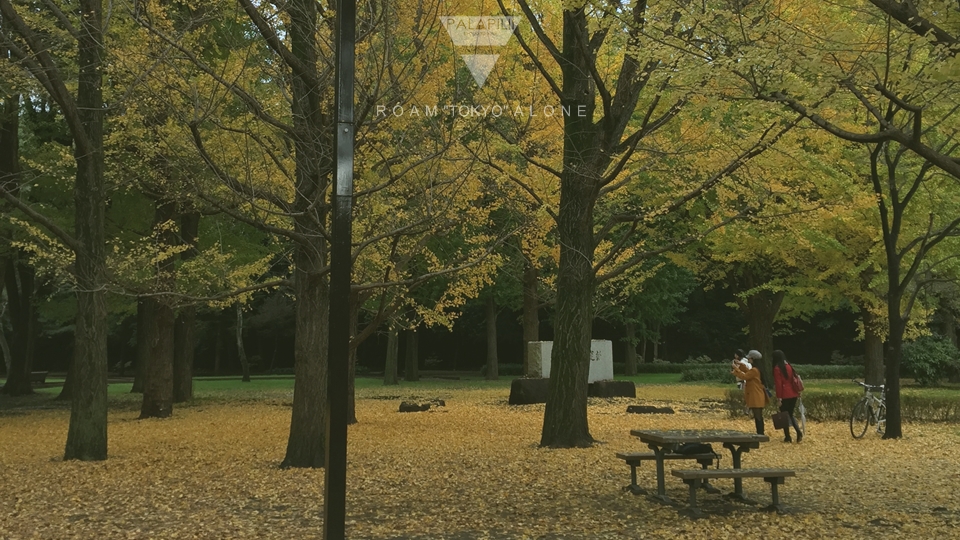
9. วันแรกใน Tokyo ผมจะบอกแค่ว่า แต่ละสถานี มีอะไรน่าสนใจบ้าง หลังจากนั้น งมหน้างานกันเองเลย สนุกมากๆ
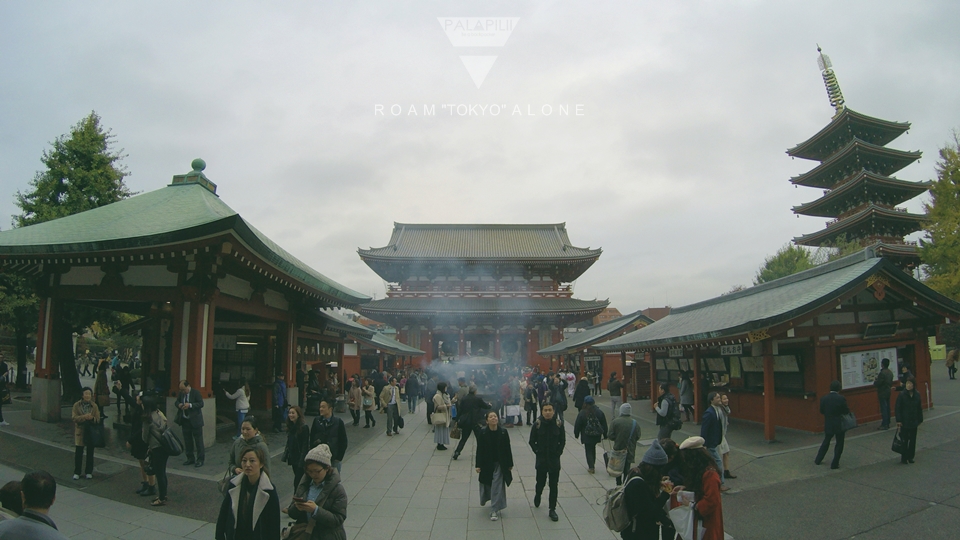
Asakusa : วัดเซนโซจิ
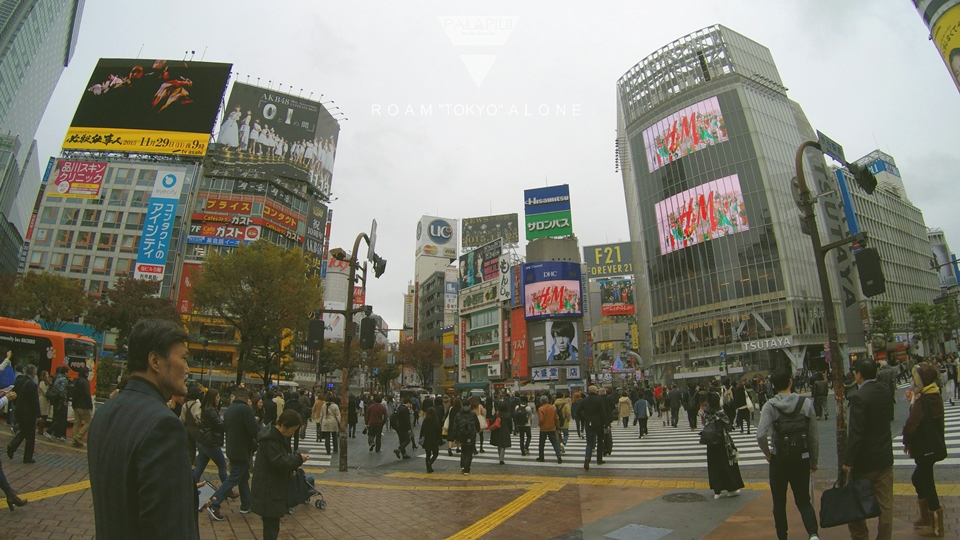
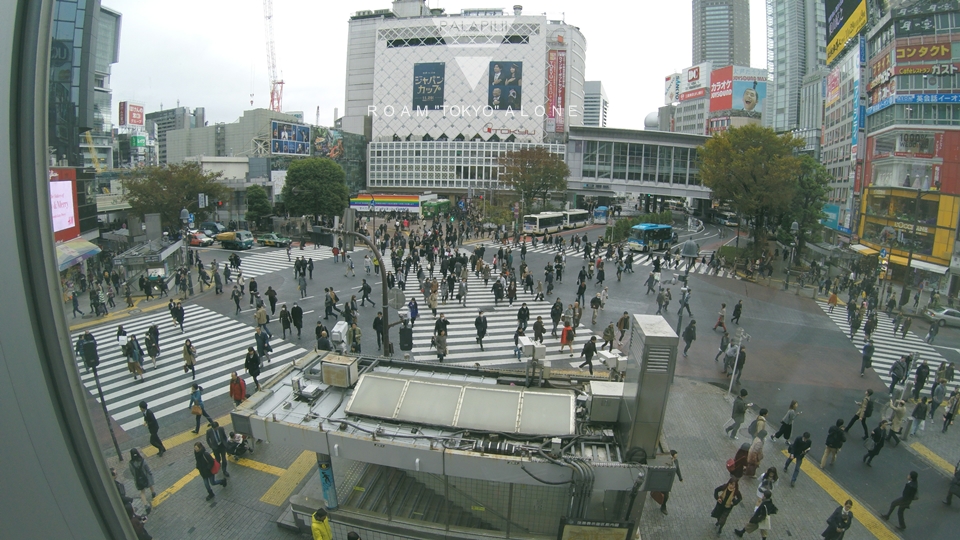
Shibuya : ห้าแยกในตำนาน, รูปปั้นหมาฮาจิโกะ, ตึก 109, แหล่งบันเทิง
harajuku : ถนน takeshita Dori, ศาลเจ้าเมจิ, สวนสาธาราณะโยโยงิ, แหล่ง shopping, แหล่งที่วัยรุ่นแต่ง cosplay
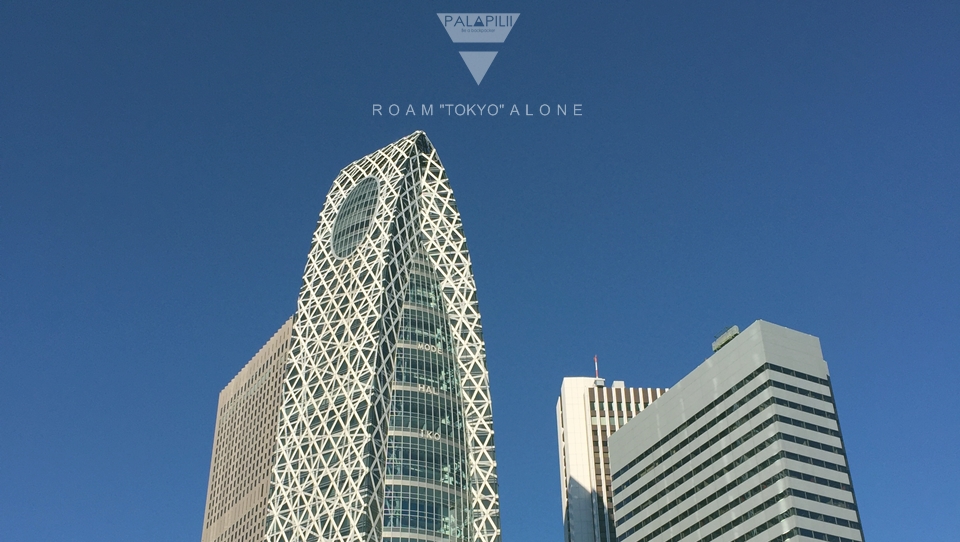
Shijuku : เป็นย่านธุรกิจ, สถานีรถไฟที่วุ่นวายที่สุดในญี่ปุ่น, แหล่ง shopping
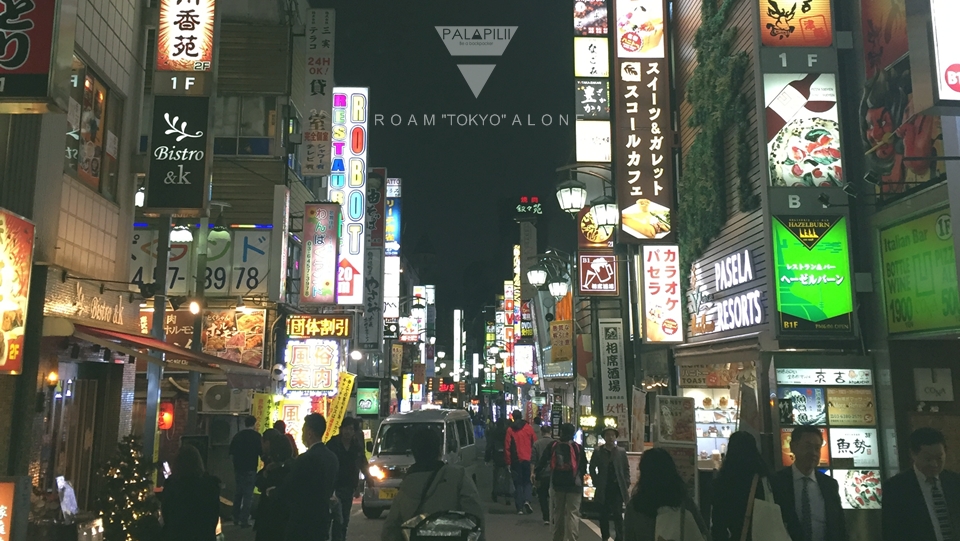
Roppongi : ย่านสถานบันเทิง
10. เรื่องที่พักสำหรับวันแรก เรายังพอมีแรงเหลืออยู่ ถ้าอยากสนุกแนะนำให้นอนที่ร้าน internet cafe, ร้านเช่าหนังสือ, ร้านเช่าหนังโป๊ อะไรพวกนี้ ราคาจะอยู่ที่ไม่เกิน 2,000 เยน สามารถอาบน้ำได้ด้วย ๕๕๕๕
11. ในช่วงที่ตระเวณรอบ Tokyo ให้จอง Bus จาก Shinjuku ไปลง Fuji Kyu Highland ไว้ด้วย ก่อนที่มันจะเต็ม เราจะไปเล่นสวนสนุกระดับโลกกัน เค้าว่ากันว่า บ้านผีสิงที่นี่ เ_ี้ยมากๆๆ ๕๕๕ รอบเร็วที่สุดคือรอบ 7 โมงเช้า และห้ามเกิน 10 โมงเช้า ไม่งั้นจะเสียเวลามากๆ ค่าใช้จ่าย 1,750¥
ทางไปจอง http://www.highwaybus.com
D A Y II
12 เดินทางราวๆ 2 ชั่วโมงก็จะถึง Fuji Kyu Highland ลงจากรถแล้วรีบบึ่งเค้าไปซื้อตั๋วเลย ค่าเข้า 1 day pass อยู่ที่ 5,200 เยน ใช้เวลาครึ่งวันถึงวันเต็มยังไงก็พอ เครื่องเล่นเด็ดๆ ที่แนะนำคือ TAKABISHA, eejanaika, TEKKOTSU BANCHO แล้วก็บ้านผีสิง
ทางไปจอง : https://www.fujiq.jp/en/attraction/
13 หลังจากเล่นสวนสนุกเสร็จ ก็ให้ไปที่สถานที JP ซื้อตั่วไป Kawakugiko ราคา 140 Yen ใช้เวลา 5 นาทีถึง หลังจากนั้น ก็ตามเดิม แนะนำให้จองที่พักมาก่อน Hostel ที่นี่ ราคาราวๆ 3,000 – 4,000 YEN
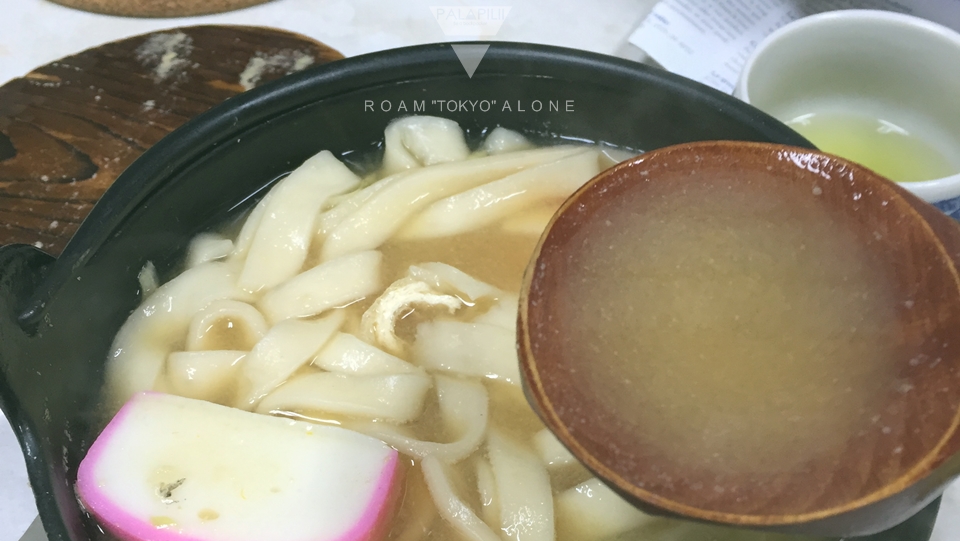
14. ที่ Kawaguchiko มีอาหารขึ้นชื่อที่ต้องลองคือ Houtou ยังไงลองหากินดูนะครับ
D A Y III
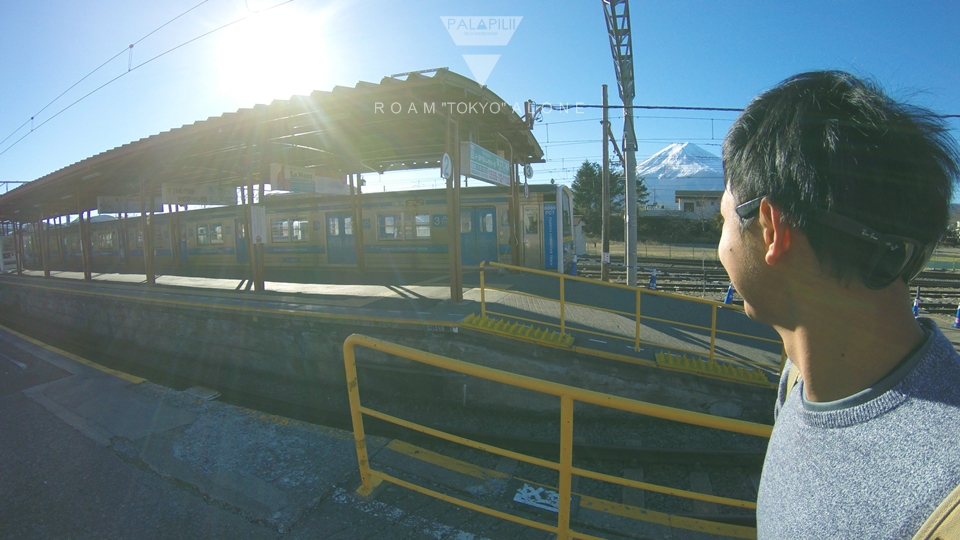
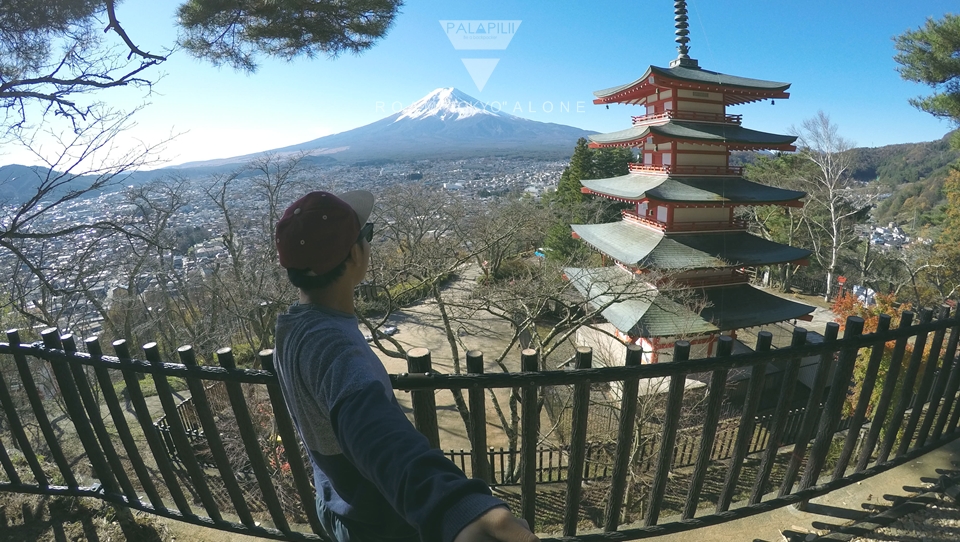
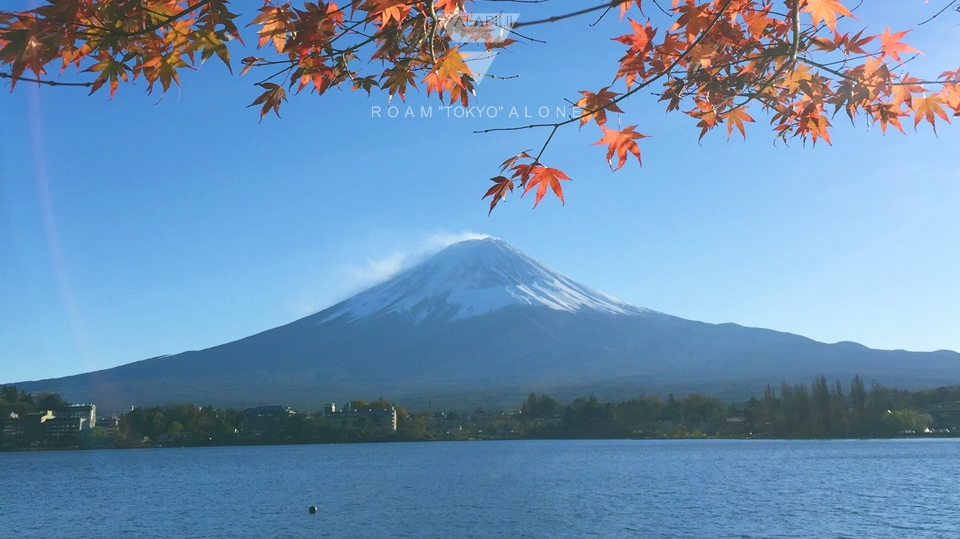
15. ตื่นแต่เช้า แล้วไปที่สถานีรถไฟ กดตั๋วราคา 140 เยนไปลงที่ Shimoyoshida Station เดินออกจาสถานีแล้วเลี้ยวขวา แล้วตามป้าย Chureito Pagoda ไปเรื่อยๆ เพื่อที่จะไปดูวิวฟูจิยามเช้า ใช้เวลาไม่นานก่อน 10 โมงเช้าควรกลับเข้ามาในเมืองคืนได้แล้ว
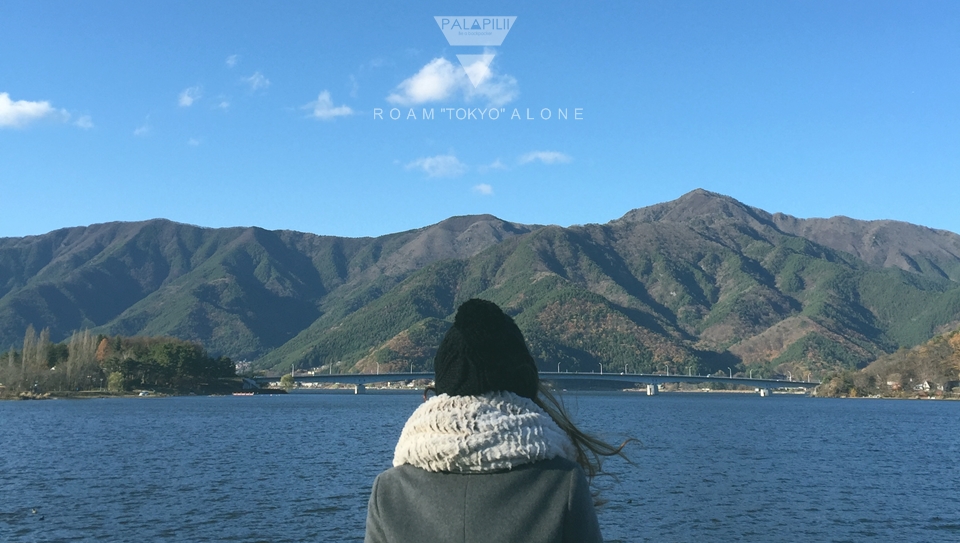
16. จากนั้น ติดต่อเช่าจักรยานกับทาง hostel ได้เลย ของ hostel จะอยู่ที่วันละ 500 เยน แต่ถ้าเป็นร้านเช่าจักรยานจะอยู่ที่ 1,500 เยนต่อวัน ก็ใช้เวลาปั่นรอบทะเลาสอบไปเลยในช่วนเย็น จนพระอาทิตย์ตกดิน ที่นัน พระอาทิตย์ตกดินตอน 4 โมงเย็น

17 หลังจากคืนจักรยาน ให้ไปรอที่ Platform 2 ขึ้นไป shibuya รอบ 17:20 น. ราคา 1,800 yen ใช้เวลาเดินทางเท่าๆ กับขามา คือไม่เกิน 2 ชั่วโมง หรือแล้แต่สภาพจราจร สำหรับคืนนี้คงเหนือ่ยมากแน่ๆ แนะนำให้เก็บแรงไว้ใช้สำหรับวันพรุ่งนี้
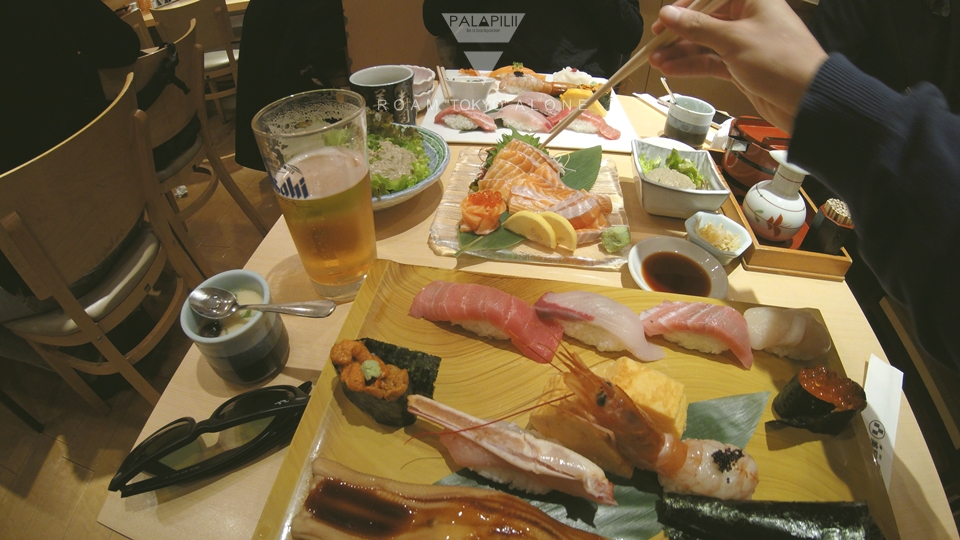
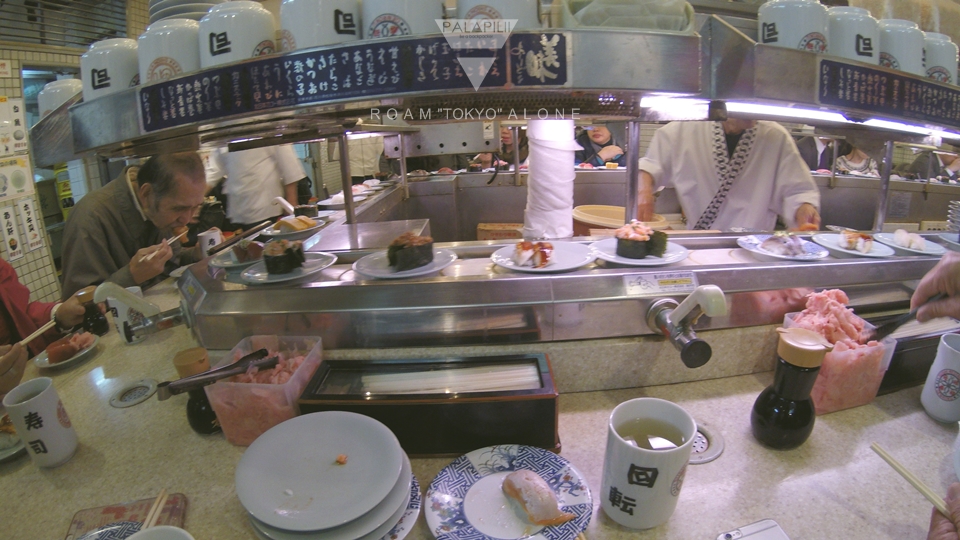
18 สำหรับคืนนี้ แนะนำให้นอน Capsule hostel ราคาคืนละ 3,500¥ ก็ลองหาดูแล้วกัน แต่ก่อนเข้าที่พัก แนะนำให้ไปร้าน Sushi ชื่อดังในย่าย shibuya ก่อน ที่นี่คนต่อแถวค่อนข้างยาว แต่รับรองความฟินได้เลย
D A Y IV

19. วันนี้คือวันสุดท้ายของทริป เราจะเดินทางไปยังเมือง Disney จากในเมืองที่เราอยู่ เดินทางโดยใช้ JR ไปสถานี Maihama ด้วยเงินราวๆ 400 เยน ใช้เวลาไม่นาน จากนั้น ก็นั่งต่อด้วย Disney line ราคา 240 เยน เพื่อไป Disney land หรือ Disney Sea ให้เลือกเอา ใช้เวลาทั้งวัน กำลังดี สำหรับผมเลือก Disney sea เพราะโอเคก่วา ขาเข้า one day pass 6,900 เยน เล่นจนเอาให้สุด
20. ที่นั่นมีของฝากสำหรับสาวๆ เพียบ อย่าลืมเจียดเวลามาซื้อของฝากด้วย หลังจากนั้นให้ไปรอที่ Platform 4 ตรงด้านหน้า Disney Sea เยื้องๆ ซ้ายหน่อย จะมี Bus มารับและไปส่งถึงสนามบิน มีหลายรอบ และรอบสุดท้ายคือ 17:00 น. สามารถเช็คตารางเวลาได้ที่http://www.tokyodisneyresort.jp/th/
:: เป็นยังไงกันบ้างครับ 20 ข้อคร่าวๆ พอจะทำให้เพื่อนๆ ไปเที่ยวโตเกียวได้ง่ายขึ้นมั้ยนะ หวังว่ารีวิวสั้นๆ หือออ… ไม่สั้นนะ ๕๕๕ เอาเป็นว่ามันคงจะมีประโยชน์กับเพื่อนๆ ไม่มากก็น้อยนะครับ ขอบคุณที่อ่านมาถึงตรงนี้
สรุปค่าใช้จ่าย (ไม่รวมตั๋วเครื่องบิน)
DAY I
Bus เข้า Tokyo Station 3,100 Y
ค่า JR เที่ยวรอบเมืองเฉลี่ยรวม 800 Y
ค่ากิน 3,000 Y
ค่าเมา 2,000Y
ค่าที่พัก นอน internet cafe 1750Y
รวม 10,650 เยน
DAY II
ค่ารถไปฟิจิคิว 1,750 Y
ค่าที่พัก 3,500Y
ค่าจักรยาน 500Y
ค่าข้าว 2,000 Y
ค่ากินขนม 1,000Y
รวม 8,750 เยน
DAY III
ค่านั่งรถกลับไปชิบูยา 1,800 Y
ค่ารถไฟ ไปดูวิวมุมสูง ฟูจิ 420 Y
ค่าขนมและข้าว 600Y
ค่า Midori 4,000Y
ค่าที่พัก 3,500Y
รวม 9,820 เยน
DAY IV
ค่ารถไฟ 600Y
ค่า Disney SEA 6,900Y
ค่ากิน ค่าขนม 1,000Y
ค่า Bus กลับสนามบิน 2,450Y
รวม 10,950 Y
ดังนั้น ค่าใช้จ่ายรวมทั้ง 4 วัน ประมาณ 40,000 เยน
หมายเหตุ : 100 เยน มีค่าราวๆ 30 บาท
ดังนั้น ทริปนี้อยุ่ในงบ 12,000 บาท เท่านั้น อีก 3,000 เป็นค่าสิ้นเปลืองชิวๆ ครับ
{:}{:en}
:: Personally, I think Tokyo we can go anytime not too soon. When I see the review about cheapest Backpack Trip to Tokyo with 20,000 baht (Not include plane ticket), I am so excited.
But…
I will make it cheaper…Hahahaha
D A Y 0

1. Book plane ticket, make sure your plan which season that you would like to visit and book the ticket in advance to save cost. AirAsiaX is the cheapest one that I have check
Click: http://www.airasia.com/

2. Order sim card for Internet because everything you have to book before going. If you wish to walk in you might miss your plan. I suggest for Sakura Sim Card and pick up at the airport, I choose promotion 3GB at 3,500 ¥ for 45 days.
Click: http://sakurasim.com/

3. Plan is very important and this is my suggestion>>>
Day1 : Spend all day in Tokyo and your can find information in Google and choose only where you really want to go to save your time.
Day2 : Go to “Fuji Mountain” at Kawakujiko
Day3 : The world famous amusement park “Fuji Kyu Highland” (then go get drunk at Roppongi)
Day4 : Choose whether Disneyland or Disney Sea, actually I think it is for children but because this is the first time we must visit. After that take the bus to the Airport.
:: You can adjust the plan or change to Nikko on the third or forth day…also quite interesting.
D A Y I

4. All done…now time to fly, I suggest to fly the night flight and arrive at Narita Airport in the morning so you can have a full day trip for the first day.
PS. If you follow No. 2 read No.5 If not skip to No. 6

5. When arrive to the airport, do not forget to pick up sim card at post office which is located in front of counter check in C and it opens at 8.30hrs. Do not forget to set VPN to support network here otherwise it will not working.

6. Go to the second floor of the airport exit 3 on the left, buy the ticket inbound to the city. I suggest to take bus for new comer because it is easier. Price at 3,100¥ and it takes about one and a half hours to Tokyo station
:: After that “Welcome to Tokyo” ^^

7. Download application “maps.me” then pin on locations that we are going and find the closest train station (tool to help you not to get lost in a big city like Tokyo)

8. To take a train in Japan is very easy and prices are list on the map.To buy the ticket, you just press button location and insert coins (The same as BTS in Thailand). Each train line has different colour it is quite easy to understand.


9. First day in Tokyo : I will only lists what are interesting in each station.
Asakusa : Sensoji Temple
Shibuya : Shibuya intersection, Hajiko Dog statue, Building 109, Midori Sushi, Night clubs
Harajuku : Takeshita Dori Road, Meiji Shirne, Yoyongi Park, Shopping center, Cosplay
Shijuku : Business area, Busiest train station in Japan, Shopping center
Roppongi : Night clubs area

10. First day, if you still have energy and would like to enjoy more fun, I suggest you to stay in Internet cafe, book rental shop, etc. for 2,000 ¥ with shower. Hahahaha

11. During travel around Tokyo do not forget to book the bus ticket from Shinjuku to Fuji Kyu Highland before it is fully booked. The world class amusement park that people say that the Ghost House is the most scary. The first bus is 7.00hrs. and should not take the bus later than 10.00hrs. Price is 1,750¥
Click: http://www.highwaybus.com
D A Y 3

12 Travel time is about 2 hours to Fuji Kyu Highland then buy the 1 day pass at 5,200¥. (Even you have a whole it is still not enough for all playthings) I recommend TAKABISHA, eejanaika, TEKKOTSU BANCHO and Ghost House
Click: https://www.fujiq.jp/en/attraction/

13 From the park, go to JP station and buy the ticket to Kawakugiko for 140¥ takes about 5 minutes. Try to book hostel before arrive there for 3,000¥ – 4,000¥ a night.

14. At Kawaguchiko has famous food calls Houtou, Do forget to try!!!
D A Y III

15. Wake up early and go to train station buy 210¥ ticket to Shimoyoshida Station. Then from the exit turn right and follow the sign Chureito Pagoda to see the view of Fuji mountain in the morning and around 10.00hrs. you should get back to the city.


16. Then rent the bicycle from the hostel for 500¥ a day. If you rent from the rental shop is 1,500¥ a day. And biking around the lake until sunset (around 16.00hrs.).


17 Return the bicycle and go to Platform 2 to go to shibuya at 17:20hrs. for 1,800¥. It takes about 2 hours depend on traffic. This day will be very tired, try to keep your energy for tomorrow.

18 Tonight I suggest Capsule hostel for 3,500¥ a night and before that you should visit the famous sushi shop in Shibuya where people are waiting for long line and I guarantee the taste.
D A Y IV

19. Last day of this trip, we are going to Disney sea by JR train to Maihama station for 400¥ and continue with Disney line for 240¥ to Disneyland or Disney Sea. I suggest you to spend the whole day there. For me, I choose Disney sea and the entrance fee for one day pass is 6,900¥.

20. Do not forget to keep sometime for souvenir buying for girls then go to wait at Platform 4 in front of Disney Sea; there is a bus to the airport (Last bus is 17.00hrs.) check bus schedule here:http://www.tokyodisneyresort.jp/th/
:: So how is it with 20 points for travelling to Tokyo??? Does help to make your trip easier?
However, I hope that this review will be useful for all you. Thank you very much for coming with me until the end.

Expenses conclusion (exclude plane ticket )
DAY I
– Bus to Tokyo Station 3,100 ¥
– JR pass around the city 800 ¥
– Food 3,000 ¥
– Drinks 2,000 ¥
– Hotel (Internet cafe) 1750 ¥
Total 10,650 ¥
DAY II
– Bus to Fuji Kyo 1,750 ¥
– Hostel 3,500 ¥
– Bicycle rental 500 ¥
– Food 2,000 ¥
– Snacks 1,000 ¥
Total 8,750 ¥
DAY III
– Round trip to Shibuya 1,800 ¥Y
– Train ticket to Fuji mountain high view 420 ¥
– Food and Snacks 600 ¥
– Midori 4,000 ¥
– Capsule hostel 3,500 ¥
Total 9,820 ¥
DAY IV
– Train ticket 600 ¥
– Disney SEA 6,900 ¥
– Food and Snacks1,000 ¥
– Bus to airport 2,450 ¥
Total 10,950 ¥
So total expenses for 4 days is around 40,000 ¥
Remark: 100 JPY = 30 THB
Therefore this trip has budget of 12,000 baht and other expenses 3,000 baht.{:}